Indoor White Balance -- Mixed Lighting
Indoor White Balance -- Mixed Lighting, or as I like to call it Gymnasium Lighting This essay concerns itself with a specific type of failure that is common and predictable: taking pictures with mixed lighting can result in colors that don't match reality. When we shoot outside there is usually one source of light. A camera's white balance system is very good at determining the average color of the light in a scene. At different times of the day, the sunlight will be more orange colored (warmer) or more blue color (cooler); but as long as sunlight is the only source of light, or at least the dominant source of light, the camera's white balance detection will seldom have trouble determining true white in the scene and will then adjust all the other colors accordingly. When we shoot photos indoors we often rely on artificial light. This light might be florescent light, halogen light, tungsten (traditional light-bulb) light, LED light or even sunlight from a window. As long as there is only one source of light our cameras will also do a good job of setting the right white balance and then adjust the other colors as well. Cameras tend to start to fail at adjusting white balance when a scene has a mixture of light sources. The human eye is a million times better than a digital camera sensor at determining true colors, even in mixed lighting settings. This means that sometimes the photographer has to manually adjust the camera's white balance in order to accurately reproduce colors. A school gymnasium (or other areas with similar lighting) is the place I have found that cameras fail in a regular and predictable manner. Gymnasiums often use a mixture of light source. Many use sodium vapor lamps, similar to street lamps, as a primary lighting source. They often also have fluorescent lamps and halogen lamps to complement the sodium vapor lamp. This type of mixed lighting is a recipe for disaster if you plan on letting your camera just sort things out. More often than not, photos will turn out with a weird green, yellow, or orange tint. Never fear, there is a way to fix things, but it means that you have to take a little control away from the camera and make some decisions that the camera just is not good at doing in a mixed light source situation.
This essay is going to cover fixing color problems in mixed lighting when you are shooting jpg images and have no desire to do any post processing. This essay will also cover the process used by people that shoot RAW and fix the color at the computer after the images have been taken. 1) Evaluate your lighting when you enter a room.
2) Find something that is supposed to be white or, if you planned ahead, take out a white piece of paper that you keep in your camera bag or pocket just for these occasions.
3) Set the camera white balance manually (this is most likely going to cause you to pick up the book that came with your camera, or take a walk through the menu settings of the camera and then hope that it is a intuitive). DSLR cameras often have a dedicated button just for white balance options.
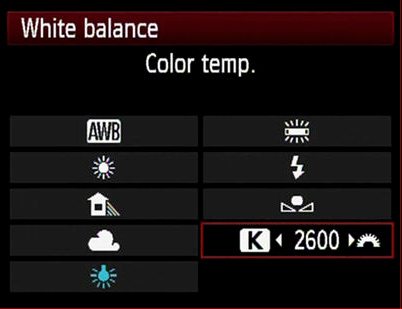
White balance menus are often very similar, even between camera manufactures.
This is what the typical white balance icon looks like. Again your camera may be different, so be sure to consult the documentation that came with your camera. Once you have found the manual white balance icon, the process of setting a custom white balance is generally simple. In most cases it involves pointing you camera at a white surface and following on screen instructions to sample the white area and then the camera is calibrated to see that particular color as white and will adjust the other colors accordingly.
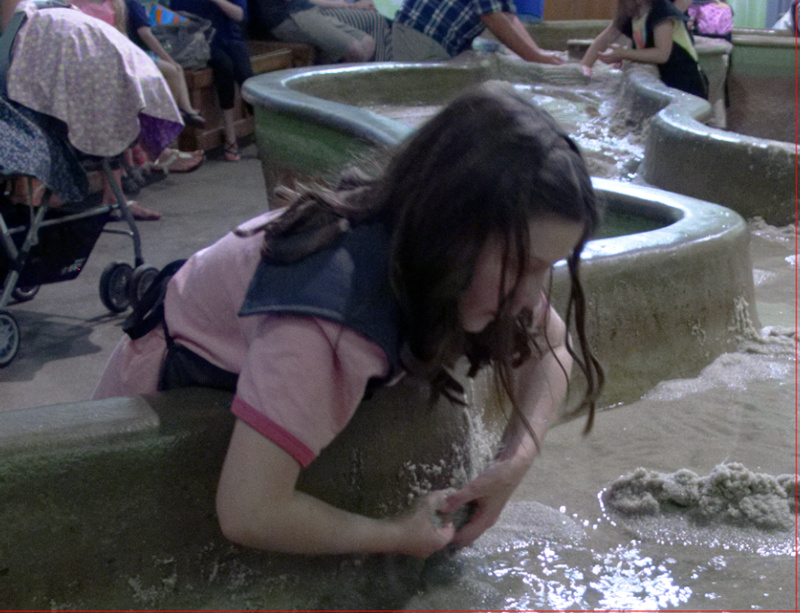
4) Take a photo to check the settings. The photo on the left was taken with auto white balance and the photo on the right represents the results of a manual or custom white balance. 5) Pay attention to your lighting as you move around the room. The custom white balance you set may not work well in every part of the room since the intensity of the various lights may vary greatly in different areas of the room.
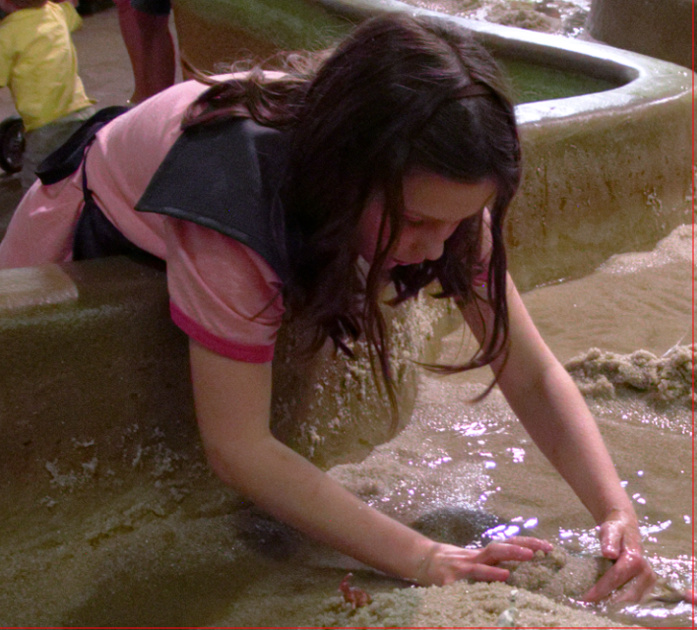
This enlarged portion of a snapshot was taken moments after the first image but it has a manual/custom white balance that is specific for the part of the room in which the photo was taken. Notice how much more natural the colors look. The colors could be improved upon in post processing but they are very close to where they need to be in-camera.
6) Do not forget to reset your camera to auto white balance when you finish shooting.
1) Evaluate your lighting when you enter a room.
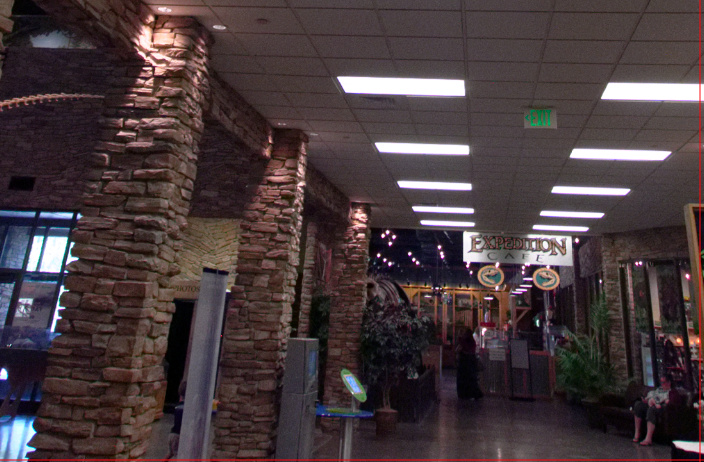
This shooting situation is tricky because it has fluorescent overhead lighting and incandescent (tungsten) lighting as accent lighting.
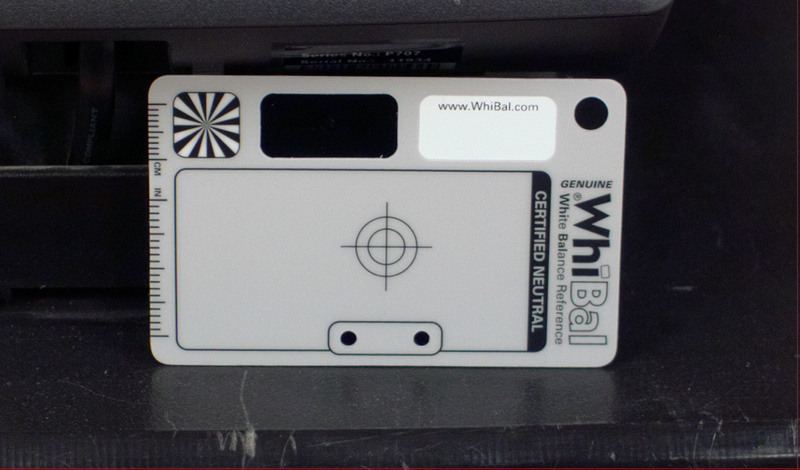
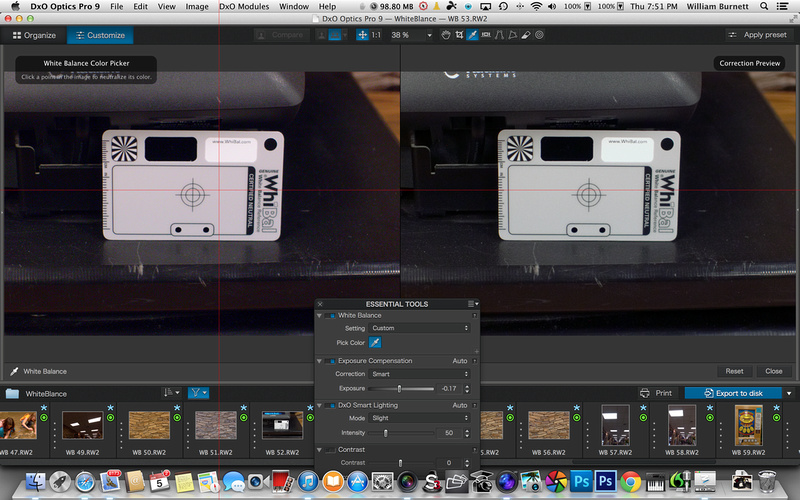
I carry a white balance card with me. Here I have proped it up against some equipment in front of a wall I was preparing to photograph. You do not have to worry about the focus being spot on just as long as you have a photo of the gray color on the card. 3) Take your photo and remember that when the light conditions change then just take another reference photo of the white balance card. 4) Load the images into your favorite post processing program. In this example I will be using DxO Optics Pro 9. 5) Find your gray card reference frame and use the White Balance Eye Dropper tool to sample the gray area of the card. Taking a sample on the gray area of a gray card is more accurate than sampling white (which is why I recommend purchasing an actual 'calibrated' gray card for photography).
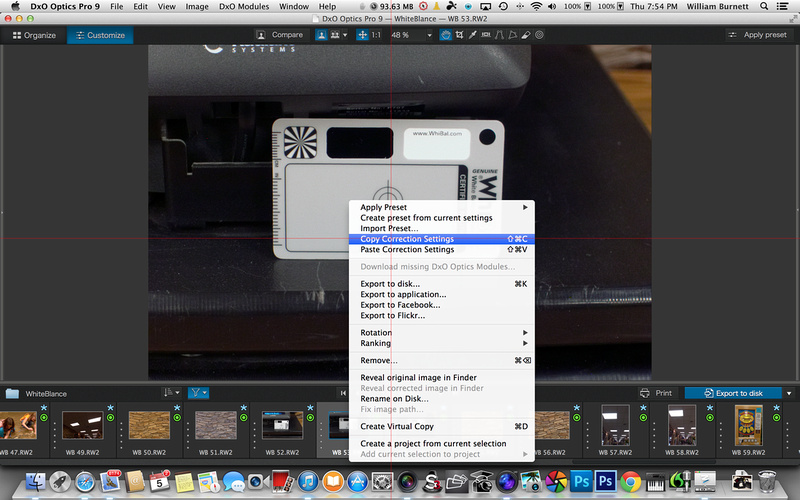
7) Copy the correction settings from your photo of the reference card. In most programs, you simply right click on the photo or photo thumbnail and select Copy Correction Settings (or a similarly named feature).
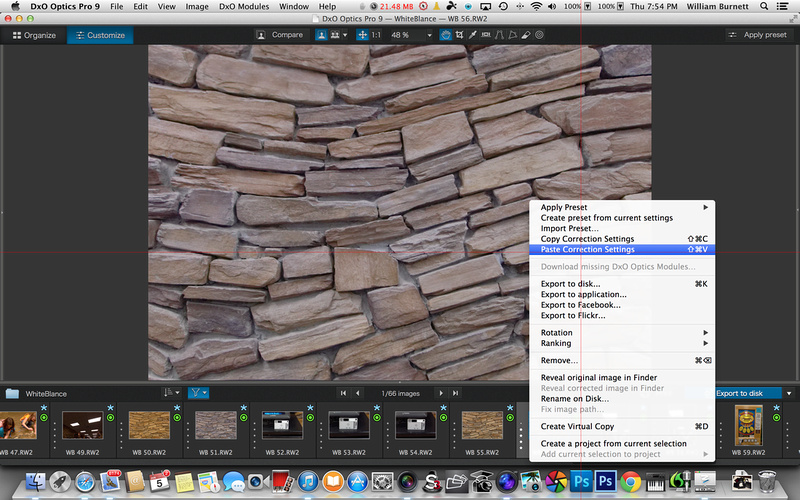
8) Paste the correction settings onto your photos that were taken in the same lighting conditions.
That is it. You will have a good white balance even in terrible mixed lighting conditions.
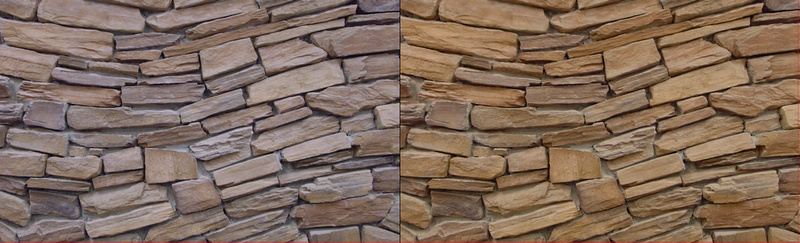
The photo on the left is pre-white balance correction and the photo on the right is after pasting the color correction from a white balance correction card. The stone wall was actually more tan than it was gray, and the white balance correction, as seen on the right, generated an accurate depiction of the color of the stones.
Keywords:
Mixed Light,
White Balance
|