Valentine Roses with an iPhone and Filter Plugins.
Valentine Roses with an iPhone and Filter Plugins.
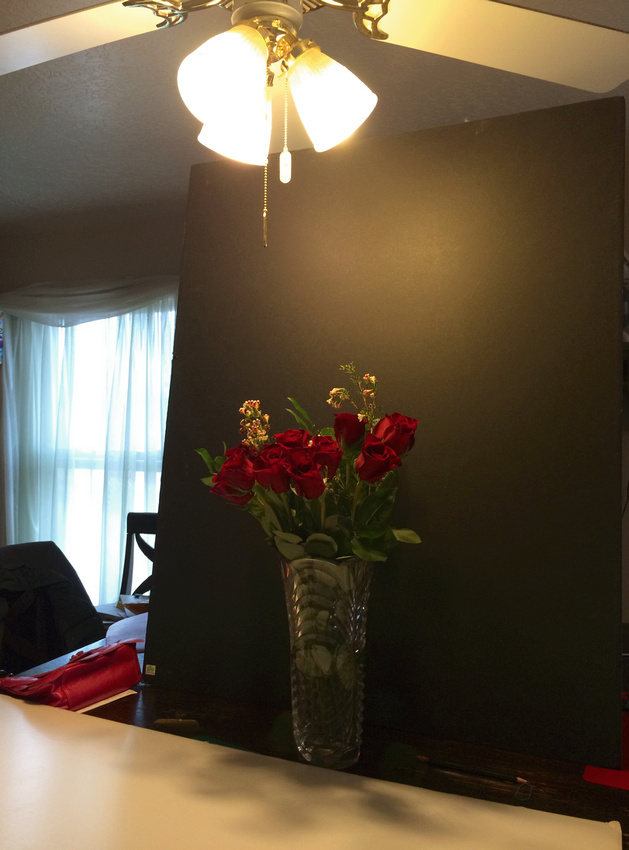
Step One: Set up your scene.
I have set the roses in front of a black background and lit them from the top using the kitchen lamp. I then placed the white board below them to reflect a bit of light back up to the under-side of the rose petals. Step Two: Set your white balance.
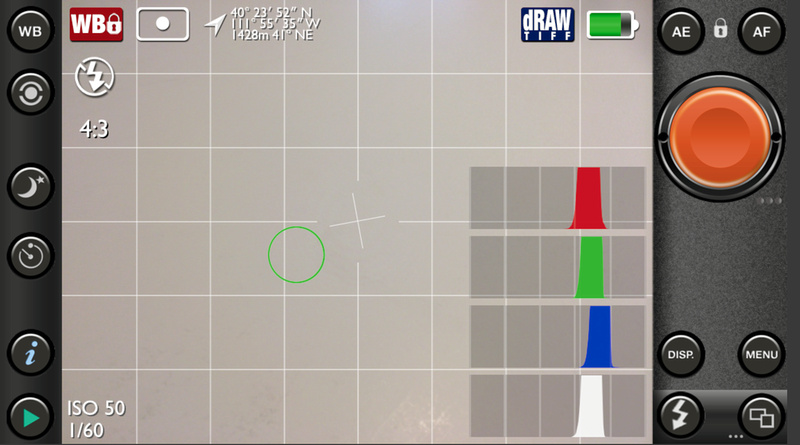
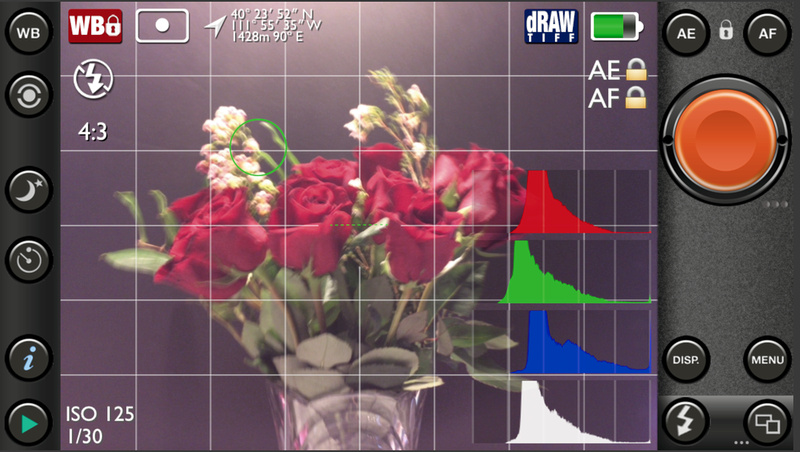
Using the Pure Shot App on my iPhone, I point my phone at the white reflector on the table and lock the White Balance (WB) in the App. Setting the White balance lets me be assured that my colors will turn out correctly.
Step Three: Set and lock Exposure and Focus.
Focus on the flowers by moving the touching the screen where you want the focus, then hit the Focus Lock (AF) button. Repeat this for the exposure (AE). Try and keep your color histograms near the middle of the graph. You don't want the histograms to be smashed against the right or the left of the graph. Step Four: Take the photo and transfer the digital file.
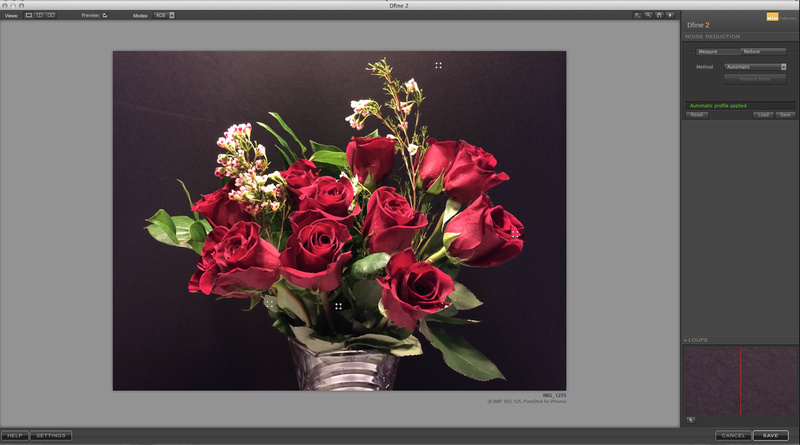
Save the file to your editing program on your computer and make a copy of the image. We always work with copies and never the originals. Step Five: Run Noise Reduction and Pre-Sharpening tools in the Nik Suite of software.
Noise Reduction on RAW and TIFF RAW files is performed using the Define 2 plugin.
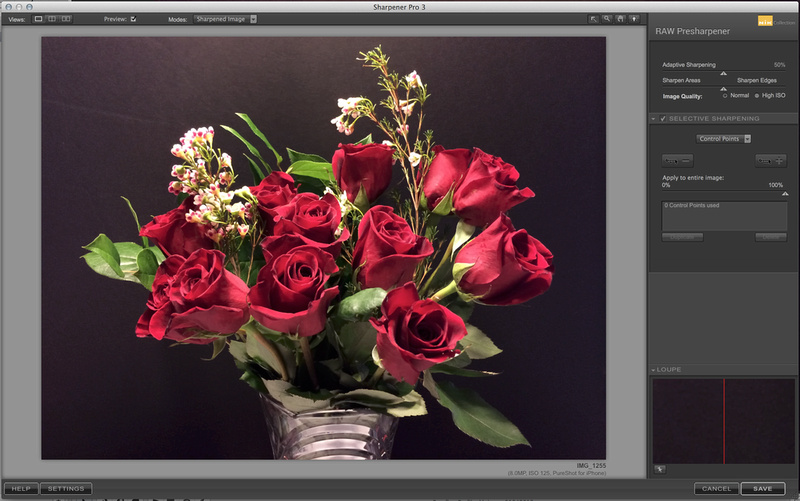
RAW and TIFF RAW images often need a bit of pre-sharpening to an image prior to manipulation. Step Six: Adjust Levels.
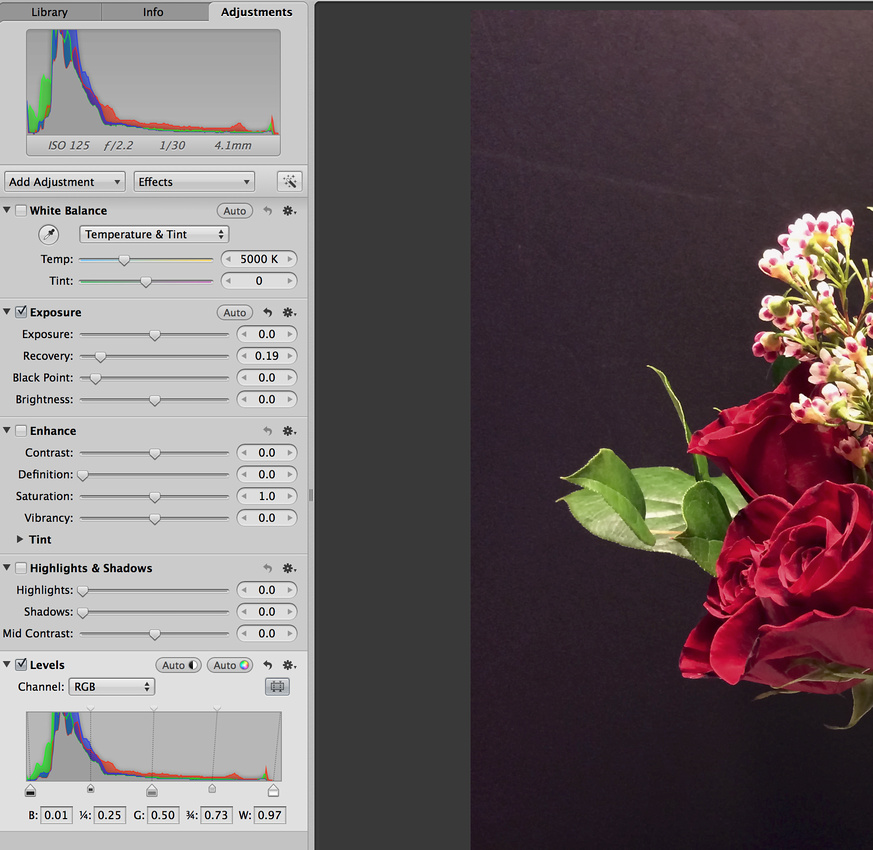
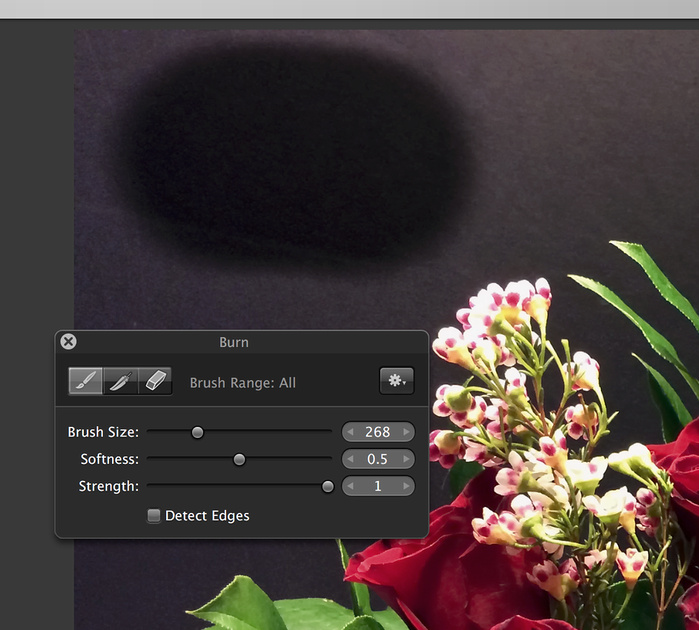
Adjusting levels, in its simplest form, is moving the sliders on the histogram to get rid of dark and light areas without information. There are many ways to use levels and also the curves functions to customize luminance and color, but these are outside the scope of this tutorial. Step Seven: Burn out the background to darken it up.
Burning is a method of making dark areas darker. It is a term that is left over from the Wet Darkroom days of photography. Of course you would not have to use the Burn Tool in Aperture to accomplish a darkening of the background. There are literally hundreds of ways to do this. You could mask out the background (Masking is a more advanced Photoshop technique), and you can adjust the black point of the image using the curves adjustment in your editing software. Since I am going for simple here, I will just use the burn tool.
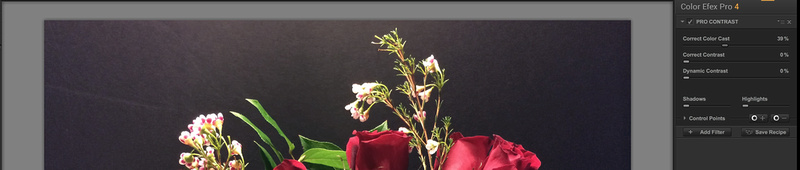
Do not be afraid to try everything. Remember you are working with a copy of your image and that means even if you mess it up, you always have the original sitting on your hard drive. Here are the filters I used on this image. I used the Pro Contrast to adjust the color cast of the image a bit.
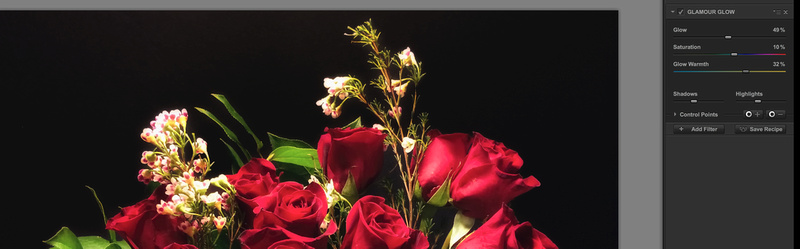
I thought the roses might look good with a little glow so I used the Glamour Glow effect.
I thought that the greens could be a little greener. The Enhance Foliage tool can really help with that.
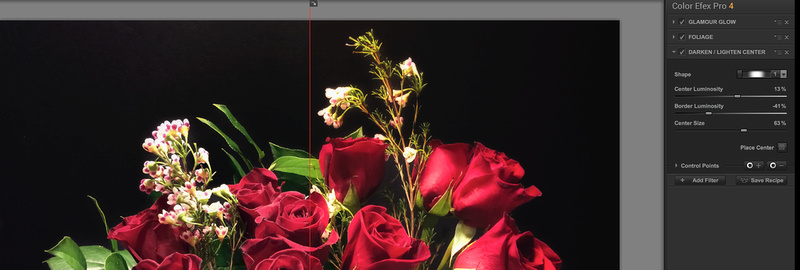
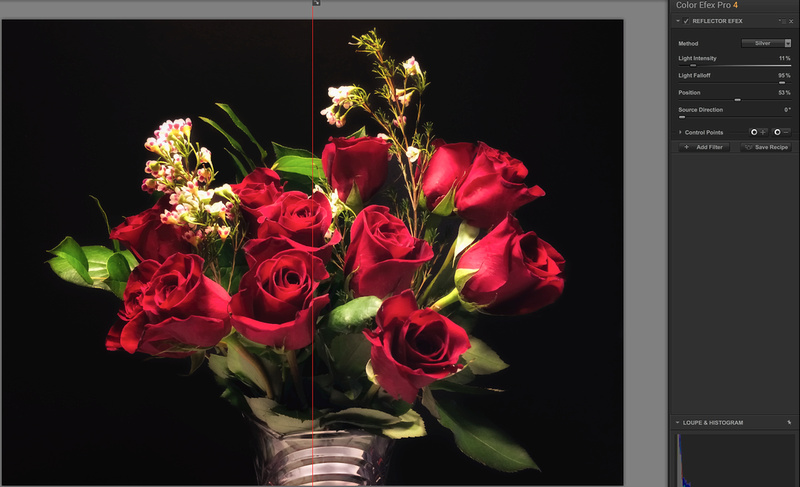
I decided to use the Darken/Lighten Center tool to direct the viewer's eye to the blooms of the roses. A neat thing about this tool is that you can place the center of brightness anywhere you want on the image and adjust the size of the area that will be brightened or darkened. The last thing I did in Nik was to apply a little bit more reflection of light to the underside of the flowers. The Reflector Efex tool lets you choose the color of the reflected light, the strength of the light, how fast the light falls off or gets dimmer, and the direction of the light. Step Nine: Apply final sharpening of selected areas of the image.
Back in Aperture, I used the Sharpening tool to sharpen a few select rose petals and leaves that I wanted the viewer to really notice. Our eyes are drawn to areas of sharp focus, and this technique lets you essentially tell the viewer what you think is important in an image. Step Ten: Compare the before and after, and then export your image to Google+, Facebook, Twitter, a blog, or print the final image.
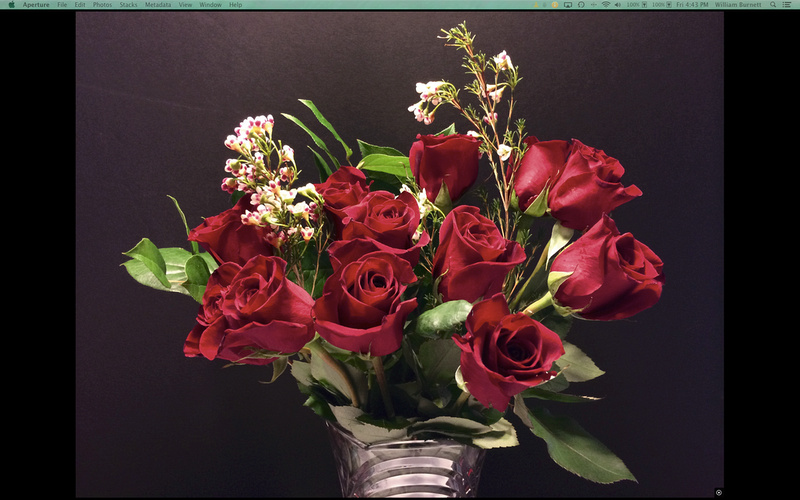
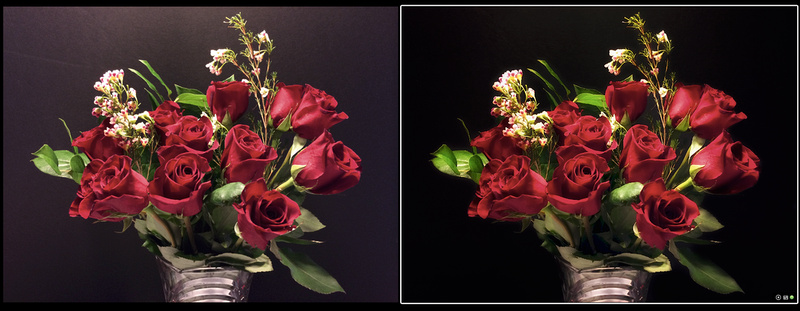
The in-camera image is on the left and the final image is on the right.
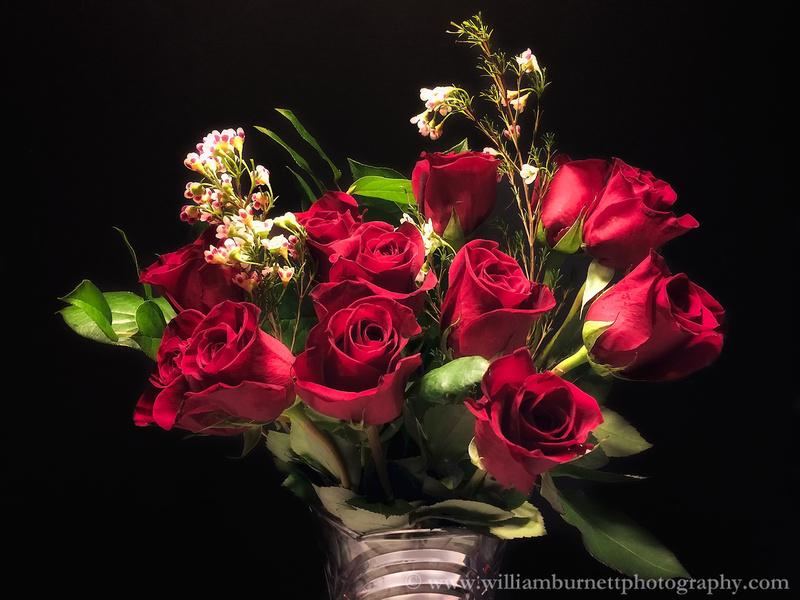
The final image.
During this tutorial I was careful to only apply global effects to the images while using the Nik plugins. 'Global application' means that changes are applied to the entire image. I did this to demonstrate how easy it is to start using filters on images. However, as you advance in photo editing, your application of global adjustments will slow and perhaps stop. I rarely use most plugins globally. Nik plugins and many other plugin packages allow for great precision in their application. I also want to emphasize that plugins are not a substitute for learning how to post-process an image. I encourage you to use plugins, if they fit your budget and needs, but I also encourage you to learn how to do these same effects in a software package like Photoshop, Corel, Gimp, or Pixlemator. I know how to do these effects in those programs, but many of the effects are time consuming to do manually. Learning how these effects are accomplished is important for the time that you no longer are content with global application of filters or effects. If you know how they work, you can apply them as an artist would apply paint to a canvas. 
Comments
No comments posted.
Loading...
|