Rembrandt Lighting: A Window and a Smile: The art of the impromptu portrait.A Window and a Smile: The art of the impromptu portrait.
A Window and a Smile: The art of the impromptu portrait.
Updated May 27, 2014 This article is for the beginner who wants to take portraits of their children, spouse, family and/or friends. No special equipment is needed other than a point and shoot camera, a subject, a window and the sun. If you have a DSLR that is great, but you don’t need one to make a stunning portrait; and to prove it, I used my point and shoot to do all the photographs for this article. 1) Set the camera. Most digital point and shoot cameras have what is known as a portrait mode. The portrait mode setting is usually found on a dial or on a menu and usually looks like a cartoon drawing of a child’s head. If your point and shoot or DSLR has this setting, then turn it there before you get ready to take the photograph. If your camera does not have this setting, see if it has an ‘exposure’ selection or ‘metering mode.’ If it only has metering mode then select ‘spot exposure’ or ‘center weighted.’ Basically you are going to want to expose the photograph just for the subject and not for the background, so the camera needs to ignore as much of the picture as it can when determining the correct exposure.   Graphic by Althepal
A typical mode selection dial on a point and shoot or DSLR camera. The dial is currently set to Auto but should be turned to the portrait mode in preparation for portrait photography. 2) Find a window. The ideal window will have venetian style blinds or perhaps a sheer curtain that allows the majority of the light to pass through into the room. I like the blinds because I can control just how much light enters the room. However, in a pinch a window with no blinds or curtain will do just fine. Here is an example: 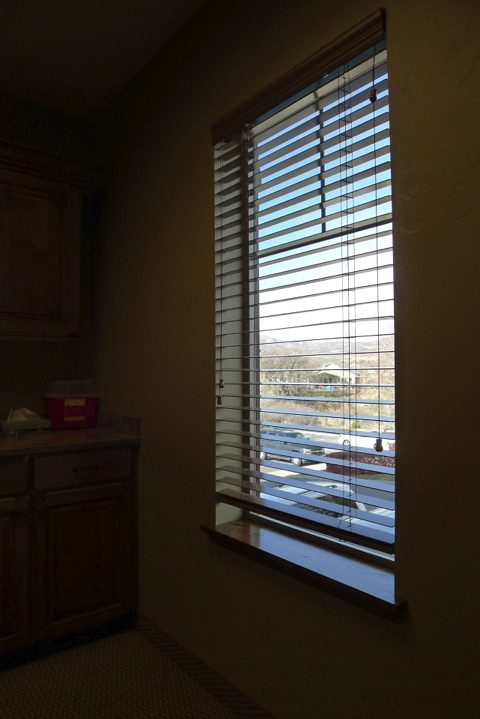
This is the window at my doctor’s office. 3) Place your subject next to the window. The idea here is to get the subject close enough to the window that the light shines on one side of their face while leaving the other side of their face in partial shadow. This type of lighting is called Rembrandt lighting. As you you may have already guessed, this is how Rembrandt posed his subjects when he would prepare to paint them. So, in his honor, this style of lighting is named after him. 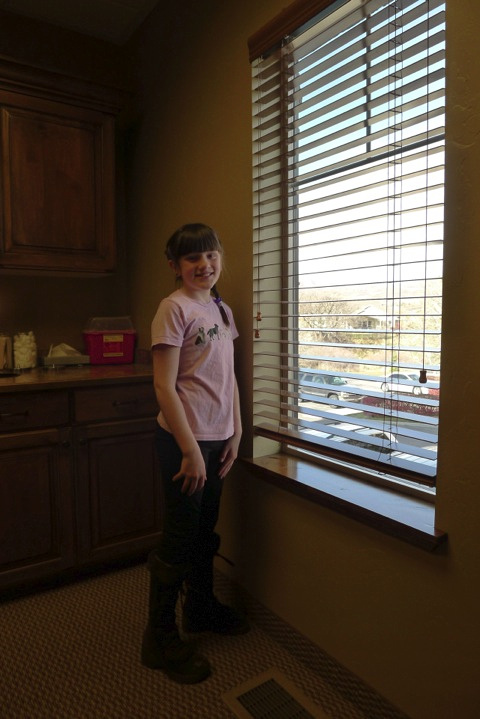
Rembrandt lighting: Place your subject near the window with the person half facing the window and turned to look back at you. One half of the face should be in partial shadow. This is a simplified form of Rembrandt lighting we are using the walls in the room as reflectors and they then act as fill light. In a studio setting you would use a single light source and then position a reflector nearly opposite that light source. Just remember the purpose of this tutorial is to keep it simple and that means we are dealing only with the window light. 4) Turn off the lights. Yep, turn the lights off and for heaven’s sake do not turn on your camera’s flash. The only source of light should be the sunlight streaming in through the window. 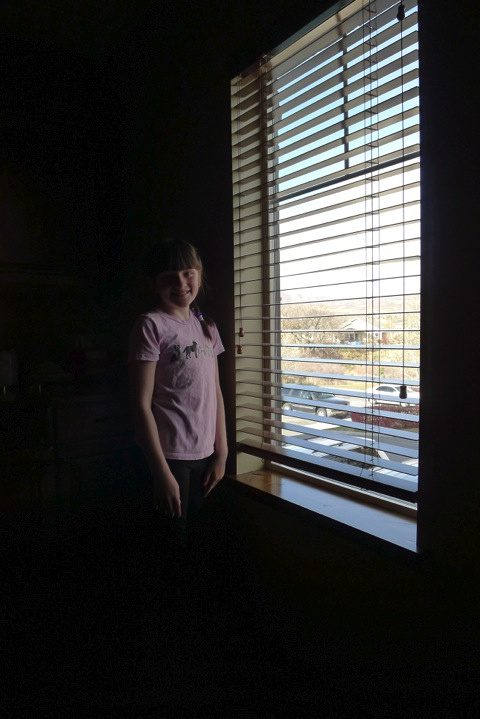
Turn off the lights. (This may make your background go completely to black, if it doesn't that is all right. What we are trying to achieve is a single light source and if you have spill over light into your background then that is just fine, if it goes completely black that is just fine too.) 5) Zoom in and take the picture. After placing your subject near the window, turn off the lights, and get about 6 - 8 feet away from your subject. Have your subject look at you, zoom in to the top 1/3 of their body, say something funny and push the shutter button when they smile. That is really all there is to it. Just fill up the frame, get them smiling and take the picture. Review your picture and if your background is too bright in the photo then switch the camera to spot metering, meter the bright part of your subject's face and take the photo again. You might also try using your EV adjustment and turning it down to -1 or -2, this will reduce the overall exposure of the entire scene as well. 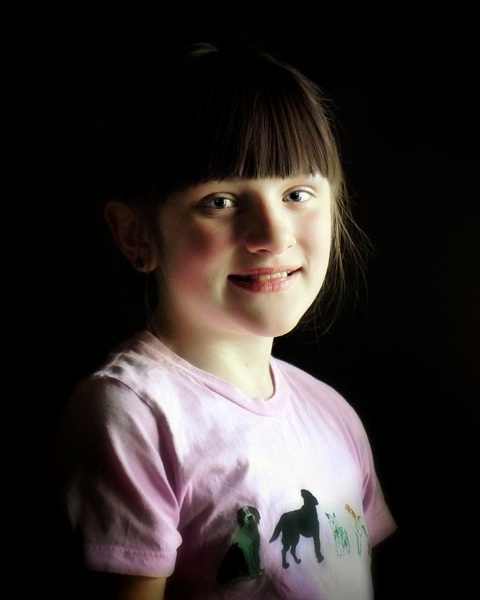
This portrait was taken using a Lunix LX5 set to portrait mode. The only source of light was sun through a window. The photo has been cropped to 8” x 10” format. A slight blur was added to the bottom portion of the photo and a very slight vignette was added to the bottom left and right corners of the photograph. The blur and vignette were added in an attempt to conceal a few wrinkles in the shirt of the subject but should not be considered requisite to the processing of the portrait. That is really all there is to taking an impromptu portrait. Get out there and get shooting. -- Enjoy
Keywords:
Rembrandt lighting

Comments
No comments posted.
Loading...
|
© William Burnett Photography